Using CMake
Building C++ projects and managing dependencies is hard. However, CMake makes it a lot more easier.
We’ll go step by step and create a simple project which will have SFML, Dear ImGui and ImGui-SFML as its dependencies. The project will clone these dependencies’ source code from Github and build them. You won’t need to use prebuilt libraries ever again.
I’ll try to explain everything as I go on down to a “basic” things. It’s good to understand everything you do and be able to do it from scratch without any guides. This article will also be a good starting point if you’ve never used CMake before.
The source code of the project in the article can be found here.
Table Of Contents
Hello, world
First, let’s create a bunch of files and directories so that we have a structure like this:
.
├── CMakeLists.txt
└── src
    ├── CMakeLists.txt
    └── main.cpp
Let’s start with a CMakeLists.txt from a root directory.
It’s simple:
cmake_minimum_required(VERSION 3.15)
project(example
  LANGUAGES CXX
  VERSION 1.0
)

add_subdirectory(src)
The first line sets up a required minimal version of CMake which can be used to build the project. CMake constantly evolves and it’s better to use the latest version for your project as each one brings handy new features, better compiler integration and bug fixes.
If you’re writing a library which will be used by many people, it’s better to stick to the lowest version of CMake that makes sense at the time. You can find the version of CMake that is available for various distros here. Another way of choosing is to look at which CMake minimum CMake version other popular C++ libraries and choose the same.
I’d recommend using something like CMake 3.8.2 or newer, unless you want to support very old distributions and users who don’t want to upgrade to newer versions for some reason.
After cmake_minimum_required, we have a project declaration:
project(example
  LANGUAGES CXX
  VERSION 1.0
)
The project is similar to a concept of “solution” in Visual Studio terminology. One project can have multiple “targets” (which roughly correspond to “projects” in VS). The target can be an executable, a library or even something which doesn’t produce any files after it’s built (e.g. it can run unit tests, linters and so on).
LANGUAGES option in a project call defines a language which your project uses so that CMake knows what kind of builds to generate. By default it’s C and CXX, but there are a lot of other options available for you (like CUDA or Fortran). If you’re doing C or C++ project, it’s optional to specify it, but it’s still useful as a “meta-data” for people who’re reading your CMake build.
VERSION option specifies a current version of your project. It can be used to generate “version” headers (see Generate Export Header), write some output in a terminal and so on. I’ve seen a lot of people getting VERSION from a current Git tag or some changelog file, but we’ll not go here in this tutorial.
add_subdirectory(<DIR>) is like an “include” and can be thought of as an inclusion of <DIR>/CMakeLists.txt into another CMake file. It’s actually a bit more complex, but it’s okay to think about it as “include” at the beginning.
It’s better to decompose CMake build files into smaller files so that you don’t get one huge CMakeLists.txt which builds everything, but is several thousands lines long and hard to maintain.
For example, if you have an examples directory, it’s good to have a examples/CMakeLists.txt which will just be a bunch of add_subdirectory calls for each sub-directory and example/some_example/CMakeLists.txt will be a build script which contains information on how to build some_example.
Here’s how src/CMakeLists.txt looks:
add_executable(example_exe main.cpp)
Yep, just one line. Here, we define our first target, example_exe.
In the add_executable call, we can specify a list of sources needed to build your library or executable. For example, you can have:
add_executable(example_exe
    Game.cpp
    ResourceManager.cpp
    main.cpp)
Another option is to use target_sources, which can be especially helpful if your target has .cpp files in several subdirectories, e.g.:
# in src/CMakeLists.txt
add_executable(example_exe)
add_subdirectory(subdir)
target_sources(example_exe PUBLIC main.cpp)
# in src/subdir/CMakeLists.txt
target_sources(example_exe source.cpp)
Read this post to learn more target_sources.
Finally, our main.cpp looks like this:
#include <iostream>

int main() {
    std::cout << "Hello, world!\n";
}
Now, let’s build this project.
Building a project
Create a “build directory”. This is a directory where all temporary CMake, build and object files will be. It’s also the directory in which your executables and libraries will be built (unless you tell CMake not to do so). Ideally, it should be outside of your “source” directory.
This concept is called “out-of-source” build and it’s great. For example, you can easily switch between different commits in your “source” directory and still be able to retain your build results if you make a new “build” directory. Another advantage is that you can have a very minimal .gitignore file, because the build artifacts will all be outside of your repo’s directory.
So, suppose you have a structure like this:
cmake-example
├── CMakeLists.txt
└── src
    ├── CMakeLists.txt
    └── main.cpp
cmake-example-build
When you’re in cmake-example-build directory (it’s empty at the moment), do this:
cmake ../cmake-example
This is the step where CMake does configuration (reading your CMake files, checking their validity, checking your compiler and so on) and generation of build files. If you’re on Windows and only have Visual Studio installed, CMake will generate Visual Studio solutions/projects by default. On Linux it’ll generate GNU Make Makefiles.
To specify a generator, simply pass a -G option with a name of your generator, for example:
cmake -GNinja ../cmake-example
ninja is a great build tool. It’s blazingly fast and I find that it performs better than GNU Make for me in most cases.
Here’s an example output of configuration and generation if it goes right:
-- The CXX compiler identification is GNU 9.3.0
-- Check for working CXX compiler: /usr/bin/c++
-- Check for working CXX compiler: /usr/bin/c++ -- works
-- Detecting CXX compiler ABI info
-- Detecting CXX compiler ABI info - done
-- Detecting CXX compile features
-- Detecting CXX compile features - done
-- Configuring done
-- Generating done
-- Build files have been written to: ...
Finally, let’s build the project:
cmake --build .
You can also build a specific target if you run
cmake --build . --target <target_name>
, for example:
cmake --build . --target example_exe
You’ll find the executable in <your-build-dir>/src/ directory or <your-build-dir>/Debug/src if you’re using Visual Studio to build the project.
$ ./src/example_exe
Hello, world!
If you’ve generated a Visual Studio solution, you can just use Visual Studio for building. It even checks if any CMakeLists.txt was modified and re-generates solution/project which changed. You’ll see VS asking if it should reload the project which has changed - you should agree do it so that it works properly.
If the target you’re building is a library, CMake will build a static one by default. To build a shared library, set BUILD_SHARED_LIBS=ON like this:
cmake -DBUILD_SHARED_LIBS=ON <source-dir>
Some generators (Visual Studio and XCode) support building multiple configurations of your projects in one build directory. You can do it by specifying --config flag during the build like so:
cmake --build . --target some_target --config Release
If in Ninja, GNU make and so on, your example_exe will be located in <build-dir>/src/, in Visual Studio it will be located in <build-dir>/src/<config>/ (e.g. <build-dir>/src/Release).
For generators which don’t support multi-configuration builds in one build directory, you’ll have to make multiple build directories for each build type.
One of the most useful configurations is RelWithDebInfo, which leaves the debug symbols inside your binary so that your release build can be easily debugged.
Managing dependencies
There are a lot of ways of managing dependencies with CMake, so let’s do a quick overview of possible ways.
Manual management
The simplest way of doing dependency management is to simply copy source code of your dependencies into your project source directory. For example, you can just copy SFML sources to your <source-dir>/dependencies/SFML and then just do add_subdirectory(dependencies/SFML) in your main CMake file (and then link to SFML’s targets as needed)
However, this is not the best way of doing it:
- It might be hard to know which exact version the dependencies are.
- You also don’t get a clear picture if you’ve modified the dependencies’ sources (e.g. to fix some problem or by mistake when you refactored something). Updating them is not fun then.
- Your source directory might become huge if you have a lot of dependencies (and the repo size might increase dramatically as well).
Git submodules
Git submodules are similar to pointers to other repositories. The pointer basically stores repo’s URL and the commit you choose to point at (e.g. commit of a specific library version). Right now, this is my preferred way of managing my dependencies.
All you need to do is to add your dependency like this:
git submodule add <link to a git repo> <dir where the submodule will be cloned to>
For example:
git submodule add https://github.com/SFML/SFML ./third_party/SFML
And now can directly use add_subdirectory(lib_dir) in your CMake build scripts and later link to the provided targets. Sometimes these targets are documented, but often you might need to look search for add_library calls in the dependency’s build scripts.
For SFML, you can do it like this:
add_subdirectory(third_party/SFML)
target_link_libraries(your_game PRIVATE sfml-graphics)
You might also want to check via CMake that dependencies were cloned, otherwise others might get errors about CMake not being able to find referenced subdirectories. You can do it like this, for example:
# in your root CMakeLists.txt
if(NOT EXISTS "${CMAKE_CURRENT_SOURCE_DIR}/third_party/SFML/CMakeLists.txt")
  message("${CMAKE_CURRENT_SOURCE_DIR}/SFML/CMakeLists.txt")
  message(FATAL_ERROR "Please initialize submodules using:\n  git submodule update --init --recursive")
endif()
You can read more about Git submodules here. This is the approach that I currently use and can recommend to many people. It’s simple and it just works.
If you’ll decide on using this approach, you can mostly skip sections which explain FetchContent and how to use it. Add dependencies as git submodules and just do add_subdirectory(...).
Package managers
There’s a bunch of package managers available for C++ right now: Conan, vcpkg and so on. They can be a great way of managing dependencies.
I don’t like them for a few reasons.
There’s no standard package manager in C++ world as of today, which leads to a fragmentation and build scripts not being available for all your dependencies. These build scripts are not supported by library maintainers most of the time, which leads to them to quickly becoming out of date with the latest version of the library or having some build features not being available to you.
And finally, I like having few dependencies. I only need Git, a C++ compiler and CMake for building things I write.
FetchContent
This is another way of doing dependency management - by having CMake “git clone” your dependencies! Basically, it allows you to download or clone source code of external projects from the Web (or other source) and then use this sources via add_subdirectory call and linking to dependency’s targets or other means.
It’s a wrapper around ExternalProject CMake command, which can do a lot of things:
- It can download or git clone other project sources
- Configure and build them
- Run some commands at various steps of build process
A typical ExternalProject declaration looks like this:
ExternalProject_Add(foobar
  GIT_REPOSITORY    git@github.com:FooCo/FooBar.git
  GIT_TAG           origin/release/1.2.3
)
The problem with it was that it did download at build time, which doesn’t allow you to link to your dependencies targets - you need to link to library files produced after the build like this:
target_include_directories(your_target PRIVATE <path-to-foorbar-includes>
target_link_libraries(your_target PRIVATE <path-to-a-build-foorbar-library>)
This wasn’t convenient, as a lot of dependencies build internals spilled into your build files and you needed to do a lot more work than simply linking to dependencies’ targets.
FetchContent solves that problem by downloading the dependency at configure time, which allows you to do this:
FetchContent_Declare(foobar
  GIT_REPOSITORY    git@github.com:FooCo/FooBar.git
  GIT_TAG           origin/release/1.2.3
)
FetchContent_MakeAvailable(foobar)

# somewhere later...
target_link_libraries(your_target PRIVATE foobar_target)
There are some downsides to using FetchContent, however:
- Your initial configuration step might take a lot of time if you have a lot of dependencies, because some repos might take a lot of time to download (it can take minutes!). However, with
ExternalProjectyou can get the same problem, but during the build process instead. - Some libraries might depend on other libraries being built and installed on the system. They will use
find_packageorfind_libraryto find them and this might cause some problems for you. I’ll talk about it find_package section of this article in more detail.
Adding SFML as a dependency
Create depedencies/CMakeLists.txt and dependencies/sfml/CMakeLists.txt. We have the following structure now:
.
├── CMakeLists.txt
├── dependencies
│   ├── CMakeLists.txt
│   └── sfml
│       └── CMakeLists.txt
└── src
    ├── CMakeLists.txt
    └── main.cpp
I like naming dependencies and their directories in lowercase, because it allows me to not have to not think if the third-party dependency directory is named “openAL”, “OpenAL” - it’ll be just “openal”. “ImGui-SFML” will be “imgui-sfml”.
First, let’s add add_subdirectory(dependencies) to our root CMakeLists.txt:
# ...

add_subdirectory(dependencies) # add this
add_subdirectory(src)
The dependencies/CMakeLists.txt looks like this:
include(FetchContent)

FetchContent_Declare(
  sfml
  GIT_REPOSITORY "https://github.com/SFML/SFML"
  GIT_TAG 2f11710abc5aa478503a7ff3f9e654bd2078ebab # 2.5.1
)

add_subdirectory(sfml)
Note that you can specify GIT_TAG by the name and not by the commit hash, but referencing by commit hash makes FetchContent quicker, because it doesn’t have to connect the remote to check if the tag hasn’t been modified.
Next, dependencies/sfml/CMakeLists.txt (I’ll explain what goes on here a bit later):
message(STATUS "Fetching SFML...")

# No need to build audio and network modules
set(SFML_BUILD_AUDIO FALSE)
set(SFML_BUILD_NETWORK FALSE)

FetchContent_MakeAvailable(sfml)
src/CMakeLists.txt looks like this now:
add_executable(example_exe main.cpp)
target_link_libraries(example_exe PRIVATE sfml-graphics)
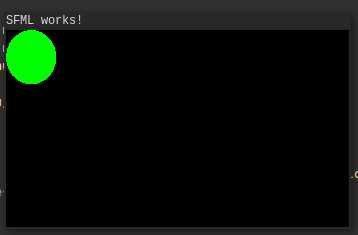
And finally, let’s change our src/main.cpp to the following “SFML Hello world” code which is used in its many examples:
#include <SFML/Graphics.hpp>

int main()
{
    sf::RenderWindow window(sf::VideoMode(200, 200), "SFML works!");
    sf::CircleShape shape(100.f);
    shape.setFillColor(sf::Color::Green);

    while (window.isOpen())
    {
        sf::Event event;
        while (window.pollEvent(event))
        {
            if (event.type == sf::Event::Closed)
                window.close();
        }

        window.clear();
        window.draw(shape);
        window.display();
    }

    return 0;
}
If you’re building on Windows, run the generation step again and set BUILD_SHARED_LIBS to OFF so that SFML doesn’t make it ON causing issues with DLLs.
cmake -DBUILD_SHARED_LIBS=OFF <source-dir>
More about this in “Copying DLLs on Windows” section.
Now, let’s build the project:
cmake --build .
A lot of the time can pass after “Fetching SFML…” message is displayed (even a minute or so).
This is normal and can be caused by your Internet connection, GitHub being slow, or older versions of CMake where FetchContent is not as quick as it can be (the developers seem to be working on its speed, so try to use the oldest version of CMake).
A lot of dependencies can be downloaded much quicker if you download a release zip instead, for example for SFML we can do this:
FetchContent_Declare(
  sfml
  URL https://github.com/SFML/SFML/archive/refs/tags/2.5.1.zip
  URL_HASH 2c4438b3e5b2d81a6e626ecf72bf75be
)
It’s also a good idea to specify URL_HASH here to not download anything which you didn’t expect. You can usually find md5 hash or release in release notes or calculate it yourself using md5sum.
Finally, run src/example_exe and you’ll see this:
Now, let’s see what’s going on in dependencies/sfml/CMakeLists.txt.
First of all, we have a message which just prints “Fetching SFML…”:
message("Fetching SFML...")
You can also have it say where it will fetch SFML from, at which commit, which version, etc. Having something printed there is useful, because otherwise you’ll not be able to take which dependency takes a lot of time to download (or fails at configuration step). However, it will also print it every time you run a generation step, even if nothing will get downloaded. I think it’s not a big deal.
Then, we have a couple of set calls which need to be done before FetchContent_MakeAvailable:
set(SFML_BUILD_AUDIO FALSE)
set(SFML_BUILD_NETWORK FALSE)
A lot of libraries allow you to modify their behaviour and build process by setting CMake variables. CMake has a complex way of how option and set(... CACHE ...) behave depending on if you have defined the variable or not. Sometimes a simple set is not enough and you’ll need to do a set(... CACHE ...) and even set(... CACHE ... FORCE) to stop dependency’s CMakeLists.txt from overwriting the variable you’re trying to set.
It’s a good practice to take a look at what gets built by default in your dependencies and tell CMake to build only what you need from the dependency (some libraries can build examples, docs and tests by default, which you probably don’t need).
Finally, we call FetchContent_MakeAvailable which basically does some internal FetchContent variable and then calls add_subdirectory for the directory it has downloaded making dependency’s targets available to you.
The source files of SFML can now be found in*build_dir*/_deps/sfml-src, SFML’s build directory and produced binaries can be found in*build_dir*/_deps/sfml-build.
Adding Dear ImGui and ImGui-SFML as dependencies
Now, let’s look at something more complicated.
I want to add ImGui-SFML as a dependency - it’s the library that allows you to easily integrate Dear ImGui and SFML. Let’s add Dear ImGui as a dependency first.
Add this to dependencies/CMakeLists.txt:
FetchContent_Declare(
  imgui
  GIT_REPOSITORY https://github.com/ocornut/imgui
  GIT_TAG 35b1148efb839381b84de9290d9caf0b66ad7d03
)

FetchContent_MakeAvailable(imgui)
Dear ImGui doesn’t have a CMake build for the time of writing. We still need to call FetchContent_MakeAvailable, though, so that we get imgui_SOURCE_DIR variable set which we’ll use when setting up ImGui-SFML in a moment.
Next, let’s add ImGui-SFML to dependencies/CMakeLists.txt:
FetchContent_Declare(
  imgui-sfml
  GIT_REPOSITORY https://github.com/SFML/imgui-sfml
  GIT_TAG 82dc2033e51b8323857c3ae1cf1f458b3a933c35
)
add_subdirectory(imgui-sfml)
Next, we’ll create dependency/imgui-sfml/CMakeLists.txt, which looks like this:
message(STATUS "Fetching ImGui-SFML...")

set(IMGUI_DIR ${imgui_SOURCE_DIR})
set(IMGUI_SFML_FIND_SFML OFF)
set(IMGUI_SFML_IMGUI_DEMO ON)

FetchContent_MakeAvailable(imgui-sfml)
Nothing special - we need to set IMGUI_DIR to a place where Dear ImGui sources can be found and set IMGUI_SFML_FIND_SFML to OFF so that ImGui-SFML doesn’t attempt to call find_package(SFML) which will fail (more about that in find_package section a bit later).
Note that add_subdirectory(imgui-sfml) should be placed after FetchContent_MakeAvailable(imgui) call, so that imgui_SOURCE_DIR gets defined.
Next, let’s change the contents of src/main.cpp to the following:
#include <SFML/Graphics/RenderWindow.hpp>
#include <SFML/System/Clock.hpp>
#include <SFML/Window/Event.hpp>

#include <imgui-SFML.h>
#include <imgui.h>

int main() {
    sf::RenderWindow window(sf::VideoMode(1280, 720), "ImGui + SFML = <3");
    window.setFramerateLimit(60);
    ImGui::SFML::Init(window);

    sf::Clock deltaClock;
    while (window.isOpen()) {
        sf::Event event;
        while (window.pollEvent(event)) {
            ImGui::SFML::ProcessEvent(event);

            if (event.type == sf::Event::Closed) {
                window.close();
            }
        }

        ImGui::SFML::Update(window, deltaClock.restart());

        ImGui::ShowDemoWindow();

        window.clear();
        ImGui::SFML::Render(window);
        window.display();
    }

    ImGui::SFML::Shutdown();

    return 0;
}
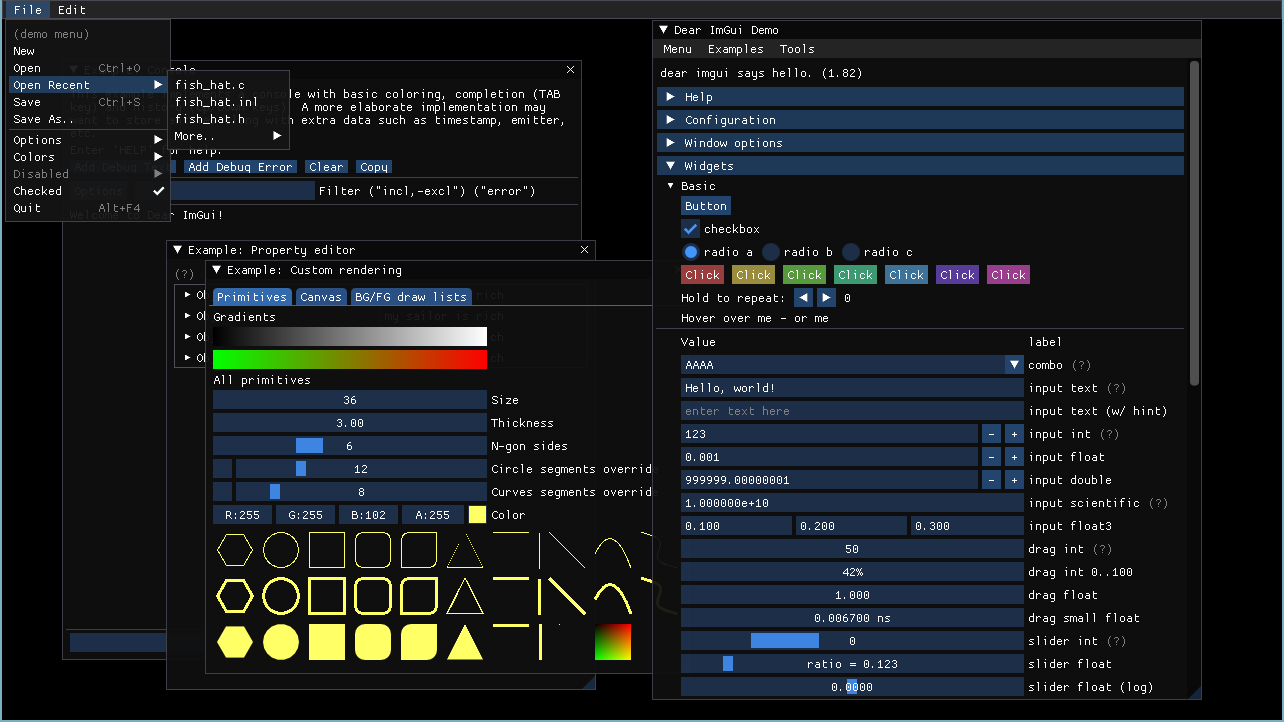
This is a “hello world” of ImGui-SFML - it calls all the necessary functions for ImGui-SFML to do its thing and calls ImGui::ShowDemoWindow which is a great way to see how many things Dear ImGui can do.
Finally, we change target_link_libraries call in src/CMakeLists.txt to the following:
target_link_libraries(example_exe PRIVATE ImGui-SFML::ImGui-SFML)
Yep, that’s it! Notice that the implicit linking to the sfml-graphics is gone - ImGui-SFML links to it in its build files, so now you don’t need to link to SFML directly.
Finally, let’s build our program and you’ll see something like this (I opened a few menus to make the screenshot more interesting).
Speeding up your builds
Of course, having to rebuild dependencies from scratch can take a lot of time. There’s a simple solution to that: ccache. This amazing program will cache all the object files you build and then instead of compiling the same source file from scratch over and over, it’ll just use the cached object file instead of doing compilation.
It works with Clang and GCC and a couple of other compilers. MSVC is not supported, unfortunately.
To use it, simply install it somewhere on your system and then do this on CMake configuration step:
cmake ... --DCMAKE_CXX_COMPILER_LAUNCHER=ccache ...
You can also add this to your CMake builds to not have to set CMAKE_CXX_COMPILER_LAUNCHER manually every time:
find_program(CCACHE_FOUND ccache)
if(CCACHE_FOUND)
  set_property(GLOBAL PROPERTY RULE_LAUNCH_COMPILE ccache)
endif(CCACHE_FOUND)
You can also add this to your .bashrc to use ccache by default with all CMake projects:
export CMAKE_CXX_COMPILER_LAUNCHER=/usr/bin/ccache
export CMAKE_C_COMPILER_LAUNCHER=/usr/bin/ccache
Using FetchContent with local source directories
Sometimes it can be useful to download sources for dependencies and have FetchContent use them instead of fetching them from the Web. This can be needed for a few reasons:
- You don’t want to download sources again and again when you remove your build directories
- You’re going somewhere where Internet connection is poor or not available
- You want to do some source changes and see how the dependency will behave with them.
This is easy to do. Just set FETCHCONTENT_SOURCE_DIR_<lib> to your dependency source dir and you’re done, for example:
cmake -DFETCHCOUNTENT_SOURCE_DIR_SFML=<sfml-dir> <main-project-source-dir>
Note that even if your library is named sfml in CMake, you’ll need to set FETCHCONTENT_SOURCE_DIR_SFML and not FETCHCONTENT_SOURCE_DIR_sfml.
Some notes about the libraries which don’t behave well
In the example I’ve showed you, everything went pretty well. In most cases it won’t - you’ll spend a lot more time trying to get the library to work with your project, so let’s look at some common cases.
Missing or poorly written CMake build
Not all libraries are built with CMake, Dear ImGui and Lua being examples. In some cases, there’s a CMake build, but it can be outdated or written in older CMake which makes build targets essentially useless (e.g. instead of target_include_libraries which carry transitive include directory dependencies, the library can use include_directories which will force you to manually specify include directories and other things for the library you link to).
There are several ways of handling this:
- The best, but most complicated way is to fork the project, fix the CMake build and submit a PR. Until the PR is merged, you point
FetchContentto the branch of your fork and wait. It’s difficult, but it helps a lot of people in the future. I’ve done it myself and noticed that CMake builds of the libraries I use (SDL, for example) have improved gradually over the years thanks to other people’s contributions - Use some “alternative” CMake build/fork of a library. For example, for Lua I use this repo and for GLEW, I use this one.
- You can use
FetchContentfor getting source code of the library and then write the needed CMake build code from scratch.
BUILD_SHARED_LIBS
A lot of libraries tend to ignore BUILD_SHARED_LIBS and either build shared libraries by default or build both static and shared library unless you tell it not to do that. You’ll probably need to look at your dependency’s CMakeList.txt to understand how to build a static or shared library depending on your needs.
In SFML’s case, if you don’t set BUILD_SHARED_LIBS to OFF, it’ll just build shared libraries, which is a bit frustrating. To fix this, you’ll need to set BUILD_SHARED_LIBS to OFF if you need to build SFML as static libraries.
Copying DLLs on Windows
If you’re using dynamic linking when building on Windows, you’ll need to copy DLLs to the directory where your executable is built, so that it can find them. This can be done by adding the following:
# Copy DLLs needed for runtime on Windows
if(WIN32)
  if (BUILD_SHARED_LIBS)
    add_custom_command(TARGET example_exe POST_BUILD
      COMMAND ${CMAKE_COMMAND} -E copy_if_different
          $<TARGET_FILE:ImGui-SFML::ImGui-SFML>
          $<TARGET_FILE:sfml-graphics>
          $<TARGET_FILE:sfml-window>
          $<TARGET_FILE:sfml-system>
          $<TARGET_FILE_DIR:example_exe>)
  endif()
endif()
Basically, CMake will take build artifacts of ImGui-SFML, sfml-graphics, sfml-window and sfml-system targets (DLLs) and copy them to the directory where executable example_exe will be built. Note that this is only done when you’re building your project, not installing it (when you run cmake --build . --target install). For that, you’ll need to add similar install steps to your build script.
find_package
If your dependency depends on other dependencies and uses find_package to find them, this can lead to a lot of problems, because in some cases, find_package tries to find built library files and does it in system directories. If you don’t have this library built or installed system-wide, find_package will fail, even though you build the dependency of dependency yourself. This issue is still not solved and discussion about it can be found here.
To handle this, make a PR or ask a library maintainer to add an option to skip find_package call if some option like XXX_FIND_Y is set to FALSE. For example, ImGui-SFML will not call find_package(SFML) if IMGUI_SFML_FIND_SFML is set to FALSE. Another way to make your library more friendly is to check if the targets you want to link to are already present, for example:
if (NOT TARGET <target_of_dependency>)
  find_package(<dependency>)
endif()

# ...

target_link_libraries(<target> PUBLIC <target_of_dependency>)
I did this to fix SDL_image not behaving well with its dependency on SDL which can be seen in this PR.
If you can’t do that for some reason, you’ll have to use ExternalProject. For example, if libA depends on libB and uses find_package to find libB, then you need to to build and install libB first via ExternalProject and only then build libA’s so that find_package(libB) succeeds. This is very complicated, which makes the first solution (modifying the CMakeLists.txt which calls find_package via any means) much easier in practice.
Closing thoughts
CMake is quite complex, and I think I only scratched the surface of how to manage a CMake project and its dependencies. However, I hope that you’ve found this article useful and it’ll be a good step to get you started and make your builds easier to manage.
Here are some recommended CMake resources to help you further:
- Professional CMake: A Practical Guide by Craig Scott. The best and most up-to-date book about CMake. It will teach you most of the things you’ll ever need from CMake. I use it as a CMake reference all the time.
- CMake tutorial and cmake-buildsystem(7) - nice overview of main CMake things and main CMake concepts in general
- “It’s time to do CMake Right” (archive) by Pablo Arias. A fantastic article about writing CMake for libraries meant to be used for other people and easy to include as a dependency in other projects.
- “Using Modern CMake Patterns to Enforce a Good Modular Design” by Mathieu Ropert. A very nice talk about writing good CMake scripts.